Things do to be a better Software Engineer

As a software engineer, there are several attitudes that you should strive to cultivate in order to be successful and effective in your work. Here are some of the key attitudes that can help you to be a successful software engineer:

  1. Curiosity: One of the most important attitudes that a software engineer can have is curiosity. A curious mindset will help you to approach problems with an open mind and a willingness to learn. It will also help you to ask questions and seek out new information, which can lead to new insights and solutions.
  2. Persistence: Software engineering can be a challenging and complex field, and it often requires a great deal of persistence and determination. You may encounter obstacles, setbacks, or difficult problems, but a persistent attitude can help you to keep going and find a solution.
  3. Attention to detail: Software engineering often involves working with complex systems and code, and even small mistakes can have significant consequences. Developing a strong attention to detail can help you to catch errors and bugs before they become bigger problems, and it can also help you to write more efficient and effective code.
  4. Flexibility: Software engineering is a constantly evolving field, and it requires a willingness to adapt to new technologies, tools, and techniques. Being flexible and open to change can help you to stay up-to-date with the latest developments in the field and to remain relevant and valuable as a software engineer.
  5. Collaboration: Software engineering often involves working as part of a team, and collaboration is key to success in this field. Developing a collaborative attitude can help you to work effectively with others, to share knowledge and ideas, and to contribute to the success of the team as a whole.
  6. Problem-solving: Software engineering is ultimately about solving problems, and developing strong problem-solving skills can help you to be successful in this field. This includes being able to identify and define problems, to analyze and evaluate potential solutions, and to implement effective solutions that meet the needs of the project or organization.
  7. Continuous learning: Software engineering is a field that is constantly evolving, and it requires a commitment to continuous learning and professional development. Developing a growth mindset and a willingness to learn new skills and techniques can help you to stay ahead of the curve and to continue to be successful in your work.

Overall, there are many attitudes that can help you to be a successful software engineer. By cultivating curiosity, persistence, attention to detail, flexibility, collaboration, problem-solving skills, and a commitment to continuous learning, you can be well-positioned for success in this exciting and dynamic field.

Handling conflicts within a team or with stakeholders

Handling conflicts within a team or with stakeholders is an important part of being a lead developer. Here are some general steps you can take to manage conflicts:

  1. Listen: The first step is to listen to both sides of the conflict. Allow each person to express their concerns and opinions, and take the time to understand their perspective.
  2. Identify the root cause: Work to identify the underlying issue that is causing the conflict. Often, conflicts arise due to miscommunication, different interpretations of the project requirements, or differences in work style.
  3. Communicate: Once you’ve identified the root cause of the conflict, communicate your understanding of the issue and work to find a resolution. Explain your perspective, and actively listen to the other person’s perspective. Keep the conversation focused on finding a solution.
  4. Collaborate: Work collaboratively with the team or stakeholders to find a solution that works for everyone. Brainstorm solutions together and consider all options.
  5. Document: Once a solution has been identified, document it clearly and communicate it to all relevant parties. This can help ensure that everyone is on the same page and that the conflict does not arise again in the future.
  6. Follow-up: Follow-up with the team or stakeholders after a conflict has been resolved to ensure that the solution is working as intended. If the solution is not effective, it may be necessary to revisit the issue and find a new solution.

It’s important to note that conflicts can be complex and require a tailored approach. As a lead developer, you should be prepared to handle conflicts as they arise, listen actively to all parties, and work collaboratively to find a solution that works for everyone. By doing so, you can help maintain a positive and productive work environment for all team members and stakeholders.

Interview Questions and Answers for hiring lead developer

When hiring a lead developer, here are some questions you should consider asking to help evaluate their skills and experience:

  1. Can you tell me about your experience leading a development team?
  2. How do you ensure that the development team is meeting deadlines and delivering quality code?
  3. Can you walk me through a particularly challenging project you’ve led?
  4. How do you stay up to date with the latest technology trends and advancements in software development?
  5. How do you handle conflicts within the team or with stakeholders?
  6. Can you provide an example of a time when you had to make a difficult technical decision?
  7. What is your experience with project management tools, such as Agile methodologies or Scrum?
  8. Can you describe your experience with various programming languages, frameworks, and databases?
  9. How do you ensure that the development process is aligned with business goals and objectives?
  10. Can you describe your experience with software testing and quality assurance processes?

By asking these questions, you can gain a better understanding of the candidate’s leadership and technical skills, as well as their ability to work effectively with team members and stakeholders. It’s also a good idea to ask follow-up questions to delve deeper into their responses and clarify any points that may need further explanation.

Here is an example answer to the question “Can you tell me about your experience leading a development team?”

  1. Start by giving an overview of your role as a lead developer and the scope of your responsibilities.
  2. Describe the size of the development team you led and the projects you worked on.
  3. Discuss the methodologies and processes you used to manage the development team, such as Agile or Scrum.
  4. Share your experience in defining project timelines and setting realistic goals for the team to meet.
  5. Discuss how you motivated the team to deliver high-quality code and meet project deadlines.
  6. Talk about how you addressed conflicts or challenges within the team and how you resolved them.
  7. Share any achievements you accomplished as a lead developer, such as delivering projects on time, increasing team productivity or efficiency, or improving code quality.

It’s important to provide specific examples from your experience to illustrate your leadership abilities and demonstrate your technical expertise. By providing specific examples, you can help the interviewer gain a better understanding of your experience and qualifications for the lead developer role.

How to answer the question about conflicts or challenges within the team and resolution?

  1. Communication breakdown: One of the most common challenges that can arise within a development team is communication breakdown. This can happen when team members are working remotely or have different schedules.

Resolution: To resolve this challenge, as a lead developer, you can ensure that everyone on the team is using the same communication tools, such as Slack, and establish regular meetings, such as daily stand-ups. You can also encourage team members to document their work and progress so that everyone is on the same page.

  1. Technical disagreements: Another common challenge within a development team is disagreements about technical decisions, such as which framework or programming language to use.

Resolution: To resolve this challenge, you can encourage team members to present their ideas and reasoning for their technical choices in a respectful manner. As a lead developer, you can help guide the conversation and come to a consensus on the best approach. In some cases, it may be necessary to do some additional research or testing to determine the best technical approach.

  1. Missed deadlines: A significant challenge within a development team is missing deadlines, which can result in project delays and unhappy stakeholders.

Resolution: To resolve this challenge, you can establish clear project timelines and milestones, regularly review progress, and take proactive measures to address any potential delays. This can include delegating tasks, increasing communication and collaboration among team members, and adjusting project timelines if necessary.

It’s important to note that every team is unique, and conflicts or challenges can arise for various reasons. As a lead developer, it’s important to be proactive in addressing these challenges and finding ways to resolve them in a collaborative and respectful manner.

Here’s an example of a challenging project requirement and how you could solve it as a lead developer:

Challenge: You have been tasked with developing a web application for a healthcare company that needs to be both secure and user-friendly. The application needs to store sensitive patient information, so security is of the utmost importance. However, it also needs to be easy to use for patients who may not be tech-savvy.

Solution: As a lead developer, you would need to balance security requirements with usability. Here are some steps you could take to address this challenge:

  1. Determine the specific security requirements for the application, such as data encryption, two-factor authentication, and secure login protocols. Work with the project stakeholders and security experts to ensure the application meets the necessary security standards.
  2. Conduct user research to understand the needs and preferences of the target audience. This can help you design a user-friendly interface and identify potential usability issues.
  3. Develop a user interface that is both visually appealing and easy to use. This can include features such as clear labeling, straightforward navigation, and easy-to-understand instructions.
  4. Implement security measures such as data encryption, secure login protocols, and role-based access controls. These measures can help protect sensitive patient information and prevent unauthorized access.
  5. Test the application thoroughly to ensure it meets security requirements and is user-friendly. This can include both manual testing and automated testing to identify any potential security vulnerabilities or usability issues.

Overall, the key to addressing this challenge is to balance security and usability, while ensuring that the application meets the needs of the project stakeholders and the target audience. As a lead developer, you will need to work closely with security experts, user experience designers, and other team members to develop a solution that meets these requirements.

Authorization in Domain-Driven Design and Clean Architecture

Authorization is an important concern in software design and can be implemented in Domain Driven Design (DDD) and Clean Architecture in a few different ways.

Defining access control rules within the domain model

One way to implement authorization in DDD and Clean Architecture is by defining access control rules within the domain model. This approach involves defining permissions and roles in the domain model itself and using these rules to control access to various resources. For example, a domain entity could have a method to check whether a particular user has permission to perform a specific action on that entity.

Pros:

  • This approach allows authorization logic to be directly integrated into the domain model, making it easier to reason about and maintain.
  • It enables the domain experts to define the authorization rules, which can lead to a better alignment of the software with the business requirements.
  • It provides more fine-grained control over authorization, as the rules can be tailored to the specific needs of the domain model.

Cons:

  • Defining authorization rules within the domain model can make the domain model more complex, which can be difficult to understand for developers who are not domain experts.
  • It can be challenging to scale this approach to larger, more complex applications where authorization rules need to be defined across multiple domain models.
  • It may not be suitable for applications with more dynamic authorization requirements, as the rules may need to change frequently, requiring updates to the domain model.

Using a separate authorization layer or service outside the domain model

Another way to implement authorization is by using a separate authorization layer or service outside the domain model. This approach involves decoupling authorization logic from the domain model and creating a separate layer or service responsible for authentication and authorization. This layer or service could use various mechanisms, such as access control lists (ACLs), role-based access control (RBAC), or attribute-based access control (ABAC), to enforce authorization rules.

Pros:

  • This approach separates authorization concerns from the domain model, making it easier to maintain and update the authorization logic independently of the domain model.
  • It enables a more centralized and consistent approach to authorization, as the authorization logic can be applied consistently across multiple domain models.
  • It can be more suitable for applications with more dynamic authorization requirements, as the authorization logic can be updated more easily without requiring changes to the domain model.

Cons:

  • It can add additional complexity to the overall system architecture, as a separate authorization layer or service needs to be designed and maintained.
  • It may require additional communication between the domain model and the authorization layer or service, which can introduce performance overhead.
  • It may not be suitable for applications where fine-grained control over authorization is required, as the authorization logic may be more generic and less tailored to the specific needs of the domain model.

Regardless of the approach, it is important to ensure that authorization rules are implemented consistently across the application and are not bypassed or ignored by any part of the system. In addition, it is important to consider the potential impact of authorization on the overall system performance, as enforcing authorization rules can be computationally expensive.

Overall, the choice of which approach to use for implementing authorization in DDD and Clean Architecture will depend on the specific requirements of the application. Developers should consider factors such as the complexity of the application, the level of security required, and the performance requirements when making this decision.

10 things that you should learn in 2023 as a Software Engineer

What are some other software engineering principle that one should learn?

1. Agile methodology: A set of principles for software development that emphasizes iterative development, collaboration between cross-functional teams, and customer feedback.

2. Test-driven development: A process of software development in which tests are written before code is written to ensure the code meets the desired requirements.

3. Refactoring: The process of improving existing code without changing its external behavior.

4. Code readability: Writing code that is easy to understand, maintain, and extend.

5. Design patterns: Common solutions to recurring design problems that can be reused in different contexts.

6. Modular programming: A design approach to break a large codebase into small, independent modules that can be reused and tested separately.

7. Version control: A system to track changes to software code and manage collaboration between developers.

8. Continuous integration: A process of merging code changes from multiple developers on a regular basis to ensure that all code is up-to-date and consistent.

9. Code reuse: Using existing software components to reduce the amount of code that needs to be written.

10. Security: Writing code that is secure and resilient to malicious attacks.

SOLID Principles in PHP

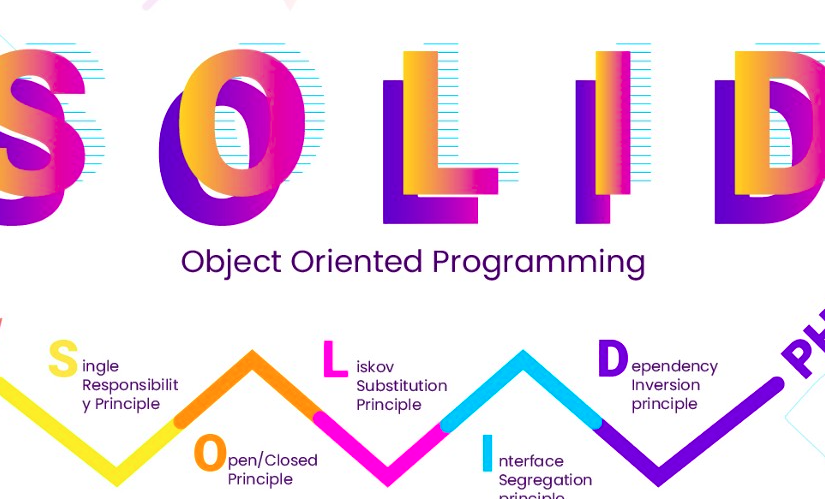
SOLID is an acronym for five design principles intended to make software designs more understandable, flexible, and maintainable. The five principles are: Single responsibility principle, Open/closed principle, Liskov substitution principle, Interface segregation principle, and Dependency inversion principle. It is designed and developed by Robert C. Martin.

The single responsibility principle states that a class should have only one reason to change. The open/closed principle states that classes should be open for extension but closed for modification. The Liskov substitution principle states that any instance of a parent class should be replaceable by its subclasses without altering the correctness of the program. The interface segregation principle states that clients should not be forced to depend on methods they do not use. The dependency inversion principle states that high-level modules should not depend on low-level modules, but instead both should depend on abstractions. Let’s see all of this in detail

The SOLID principles help software engineers create software designs that are more understandable, flexible, and maintainable. By adhering to these principles, software engineers can create code that is easier to debug, extend, and maintain. The single responsibility principle, for example, helps engineers create code that is more modular, meaning that it can be changed without affecting the rest of the code. The open/closed principle helps engineers create code that can be easily extended without needing to modify the existing code. The Liskov substitution principle helps engineers refactor code while still ensuring that the program remains correct. The interface segregation principle helps engineers create code that is more loosely coupled, meaning that it is easier to make changes without impacting other parts of the code. Finally, the dependency inversion principle helps engineers create code that is more maintainable by ensuring that high-level modules do not depend on low-level modules.

Single Responsibility Principle

The single responsibility principle states that a class should have only one reason to change. This principle encourages code that is more modular, meaning that it can be changed without affecting the rest of the code.

For example, in PHP, a class might have methods for retrieving data from a database, formatting it for display, and displaying it to the user. This class violates the single responsibility principle, since it has three separate responsibilities (retrieving data from the database, formatting the data, and displaying it to the user).

A better approach would be to have separate classes for each responsibility. For example, one class could be responsible for retrieving data from the database, another for formatting the data, and a third for displaying the data to the user. This approach would make the code more modular, meaning that it could be more easily changed and maintained.

Here is an example of code that does not follow the single responsibility principle:

<?php

class DataHandler {
    public function getData() {
        // code to retrieve data from the database
    }
    
    public function formatData($data) {
        // code to format the data
    }
    
    public function displayData($data) {
        // code to display the data to the user
    }
}

$handler = new DataHandler();
$data = $handler->getData();
$data = $handler->formatData($data);
$handler->displayData($data);

Here is an example of code in PHP that follows the single responsibility principle:

<?php

class Database {
    public function getData() {
        // code to retrieve data from the database
    }
}

class Formatter {
    public function formatData($data) {
        // code to format the data
    }
}

class Display {
    public function displayData($data) {
        // code to display the data to the user
    }
}

$database = new Database();
$data = $database->getData();

$formatter = new Formatter();
$data = $formatter->formatData($data);

$display = new Display();
$display->displayData($data);

Open/closed Principle

The open/closed principle states that classes should be open for extension but closed for modification. This principle encourages code that is more reusable and can be easily extended without needing to modify the existing code.

For example, in PHP, a class might have a method for calculating the total of a purchase. This method could be modified to include additional discounts or taxes. However, this violates the open/closed principle, since the existing code must be changed in order to add additional discounts or taxes.

A better approach would be to have a separate class that is responsible for calculating discounts or taxes. This class can then be extended to add additional discounts or taxes without needing to change the existing code.

For example:

<?php

class Order {
    public function calculateTotal() {
        // code to calculate total
    }
}

class DiscountCalculator {
    public function calculateDiscount($total) {
        // code to calculate discount
    }
}

class TaxCalculator {
    public function calculateTax($total) {
        // code to calculate tax
    }
}

$order = new Order();
$total = $order->calculateTotal();

Here is another example of code in PHP that follows the open/closed principle:

<?php

abstract class PaymentMethod {
    abstract public function processPayment($amount);
}

class CreditCard extends PaymentMethod {
    public function processPayment($amount) {
        // code to process payment with credit card
    }
}

class PayPal extends PaymentMethod {
    public function processPayment($amount) {
        // code to process payment with PayPal
    }
}

$paymentMethod = new CreditCard();
$paymentMethod->processPayment(100);

In this example, the abstract class PaymentMethod defines an abstract method processPayment(), which must be implemented by any class that extends it. The CreditCard and PayPal classes extend PaymentMethod and implement the processPayment() method. This allows the code to be easily extended to include additional payment methods without needing to modify the existing code.

Liskov substitution principle

The Liskov substitution principle states that any instance of a parent class should be replaceable by its subclasses without altering the correctness of the program. This principle encourages code that is more modular, meaning that it can be changed without affecting the rest of the code.

For example, a parent class might define a method for calculating the area of a shape. A subclass might override this method to calculate the area of a triangle, but it should still produce the same result as the parent class method. This ensures that code that relies on the parent class can still work correctly when using the subclass.

Here is an example of code in PHP that follows the Liskov substitution principle:

<?php

abstract class Shape {
    abstract public function calculateArea();
}

class Circle extends Shape {
    private $radius;
    
    public function __construct($radius) {
        $this->radius = $radius;
    }
    
    public function calculateArea() {
        return pi() * pow($this->radius, 2);
    }
}

class Square extends Shape {
    private $side;
    
    public function __construct($side) {
        $this->side = $side;
    }
    
    public function calculateArea() {
        return pow($this->side, 2);
    }
}

function calculateTotalArea(Shape $shape) {
    return $shape->calculateArea();
}

$circle = new Circle(2);
$area = calculateTotalArea($circle); // 12.566370614359

Interface segregation principle

The interface segregation principle states that clients should not be forced to depend on methods they do not use. This principle encourages code that is more loosely coupled, meaning that it is easier to make changes without impacting other parts of the code.

For example, in PHP, a class might have several methods for retrieving data from a database. However, if a client only requires one of these methods, it should not be forced to depend on the other methods.

A better approach would be to have separate interfaces for each responsibility. For example, one interface could be responsible for retrieving data from the database, another for formatting the data, and a third for displaying the data to the user. This approach would make the code more loosely coupled, meaning that it could be more easily changed and maintained.

For example:

<?php

interface DatabaseRetriever {
    public function getData($query);
}

interface DataFormatter {
    public function formatData($data);
}

interface DataDisplayer {
    public function displayData($data);
}

class DatabaseRetrieverImpl implements DatabaseRetriever {
    public function getData($query) {
        // code to retrieve data from the database
    }
}

class FormatterImpl implements DataFormatter {
    public function formatData($data) {
        // code to format the data
    }
}

class DisplayImpl implements DataDisplayer {
    public function displayData($data) {
        // code to display the data to the user
    }
}

In this example, there are three separate interfaces: DatabaseRetriever, DataFormatter, and DataDisplayer. Each interface defines one responsibility, and any class that implements one of these interfaces is only required to implement that responsibility. This ensures that classes can be easily extended to include additional responsibilities without needing to modify the existing code. For example, if a new requirement arises to format the data before displaying it, the FormatterImpl class can be extended to include this functionality without needing to modify the DatabaseRetrieverImpl or DisplayImpl classes.

Dependency inversion principle

The dependency inversion principle states that high-level modules should not depend on low-level modules, but instead both should depend on abstractions. This principle encourages code that is more maintainable by ensuring that high-level modules do not depend on low-level modules.

For example, in PHP, a high-level module might depend on a low-level module to retrieve data from a database. This violates the dependency inversion principle, since the high-level module is now dependent on the low-level module.

A better approach would be to have an abstraction that is responsible for retrieving data from the database. This abstraction can then be implemented by a low-level module, and the high-level module can depend on the abstraction instead of the low-level module. This approach would make the code more maintainable, since the high-level module does not need to be changed if the implementation of the low-level module changes.

For example:

<?php

interface DatabaseInterface {
    public function getData($query);
}

class Database implements DatabaseInterface {
    public function getData($query) {
        // code to retrieve data from the database
    }
}

class HighLevelModule {
    private $database;
    
    public function __construct(DatabaseInterface $database) {
        $this->database = $database;
    }
    
    public function getData($query) {
        return $this->database->getData($query);
    }
}

$database = new Database();
$highLevelModule = new HighLevelModule($database);
$data = $highLevelModule->getData('SELECT * FROM table');

Here is a more realistic example of code in PHP that follows the dependency inversion principle:

<?php

interface LoggerInterface {
    public function log($message);
}

class FileLogger implements LoggerInterface {
    public function log($message) {
        // code to write message to log file
    }
}

class DatabaseLogger implements LoggerInterface {
    public function log($message) {
        // code to write message to database
    }
}

class User {
    private $logger;
    
    public function __construct(LoggerInterface $logger) {
        $this->logger = $logger;
    }
    
    public function log($message) {
        $this->logger->log($message);
    }
}

In this example, the User class depends on an abstraction (the LoggerInterface) instead of a concrete class (the FileLogger or DatabaseLogger classes). This ensures that the User class does not need to be changed if the implementation of the logger classes changes. For example, if a new requirement arises to log messages to a different source, the FileLogger or DatabaseLogger classes can be replaced with a different class that implements the LoggerInterface interface, and the User class does not need to be changed.

Repository pattern in PHP and its use cases

The Repository Pattern is a design pattern that provides a centralized location for data access and management in an application. It acts as an intermediary between the data layer (such as a database) and the application layer. The Repository Pattern is used to separate the application’s data access logic from the rest of the application.

Here is an example of the Repository Pattern in PHP:

<?php

interface RepositoryInterface {
    public function getAll();
    public function getById($id);
    public function create($data);
    public function update($id, $data);
    public function delete($id);
}

class UserRepository implements RepositoryInterface {
    private $db;

    public function __construct(PDO $db) {
        $this->db = $db;
    }

    public function getAll() {
        $stmt = $this->db->prepare("SELECT * FROM users");
        $stmt->execute();
        return $stmt->fetchAll(PDO::FETCH_OBJ);
    }

    public function getById($id) {
        $stmt = $this->db->prepare("SELECT * FROM users WHERE id=?");
        $stmt->execute([$id]);
        return $stmt->fetch(PDO::FETCH_OBJ);
    }

    public function create($data) {
        $stmt = $this->db->prepare("INSERT INTO users (name, email) VALUES (?, ?)");
        return $stmt->execute([$data['name'], $data['email']]);
    }

    public function update($id, $data) {
        $stmt = $this->db->prepare("UPDATE users SET name=?, email=? WHERE id=?");
        return $stmt->execute([$data['name'], $data['email'], $id]);
    }

    public function delete($id) {
        $stmt = $this->db->prepare("DELETE FROM users WHERE id=?");
        return $stmt->execute([$id]);
    }
}

In this example, the RepositoryInterface defines the methods that a repository must implement. The UserRepository class implements the RepositoryInterface and provides the actual implementation for the methods. The UserRepository class uses the PDO class to access the database.

With the Repository Pattern, the application can access the data through the repository and the repository takes care of the actual data access logic. This helps to keep the data access logic separate from the rest of the application and makes it easier to maintain and update the application.

The Repository Pattern has several use cases, including:

  1. Decoupling the data access logic from the rest of the application: By using the Repository Pattern, the data access logic can be separated from the rest of the application. This makes it easier to change the data access logic without affecting the rest of the application.
  2. Centralizing data access: The Repository Pattern provides a centralized location for data access and management. This makes it easier to manage the data access logic and to maintain a consistent way of accessing data throughout the application.
  3. Enhancing testability: By using the Repository Pattern, it is easier to write unit tests for the data access logic. The tests can be written against the repository interface, which allows for easy mocking of the data access layer.
  4. Improving security: The Repository Pattern can help to improve the security of the application by centralizing the data access logic and enforcing a consistent way of accessing data. This makes it easier to implement security measures, such as input validation and output sanitization, in a single location.
  5. Supporting multiple data sources: The Repository Pattern can be used to support multiple data sources. By creating a separate repository for each data source, the application can access each data source in a consistent way.
  6. Facilitating code reuse: The Repository Pattern makes it easier to reuse the data access logic across multiple parts of the application. This can lead to more consistent and efficient data access, as well as faster development times.

Overall, the Repository Pattern is a useful tool for organizing the data access logic in an application and making it easier to maintain and update.

Here is an example of how the Repository Pattern can enhance testability in PHP:

<?php

interface UserRepositoryInterface {
    public function getByEmailAndPassword($email, $password);
}

class UserRepository implements UserRepositoryInterface {
    private $db;

    public function __construct(PDO $db) {
        $this->db = $db;
    }

    public function getByEmailAndPassword($email, $password) {
        $stmt = $this->db->prepare("SELECT * FROM users WHERE email=? AND password=?");
        $stmt->execute([$email, hash('sha256', $password)]);
        return $stmt->fetch(PDO::FETCH_OBJ);
    }
}

class UserService {
    private $userRepository;

    public function __construct(UserRepositoryInterface $userRepository) {
        $this->userRepository = $userRepository;
    }

    public function login($email, $password) {
        $user = $this->userRepository->getByEmailAndPassword($email, $password);
        if (!$user) {
            throw new Exception("Invalid email or password");
        }
        return $user;
    }
}

In this example, the UserRepository implements the UserRepositoryInterface and provides the implementation for the getByEmailAndPassword method, which retrieves a user from the database based on the email and password. The UserService class depends on the UserRepositoryInterface and uses the repository to access the data. The login method in the UserService class uses the repository to retrieve the user based on the email and password, and throws an exception if the user is not found.

This design makes it easy to write unit tests for the UserService class, as it can be tested in isolation from the data access layer. You can mock the UserRepository and configure it to return specific values for the getByEmailAndPassword method, which makes the tests more reliable and easier to write.

Here’s an example of a unit test for the login method in the UserService class:

<?php

use PHPUnit\Framework\TestCase;

class UserServiceTest extends TestCase {
    public function testLoginSuccess() {
        $email = "test@example.com";
        $password = "password";
        $user = (object) [
            "id" => 1,
            "email" => $email,
            "password" => hash('sha256', $password),
        ];

        $userRepositoryMock = $this->createMock(UserRepositoryInterface::class);
        $userRepositoryMock->expects($this->once())
            ->method('getByEmailAndPassword')
            ->with($this->equalTo($email), $this->equalTo($password))
            ->willReturn($user);

        $userService = new UserService($userRepositoryMock);
        $result = $userService->login($email, $password);

        $this->assertEquals($user, $result);
    }

    public function testLoginFail() {
        $email = "test@example.com";
        $password = "password";

        $userRepositoryMock = $this->createMock(UserRepositoryInterface::class);
        $userRepositoryMock->expects($this->once())
            ->method('getByEmailAndPassword')
            ->with($this->equalTo($email), $this->equalTo($password))
            ->willReturn(null);

        $userService = new UserService($userRepositoryMock);

        $this->expectException(Exception::class);
        $this->expectExceptionMessage("Invalid email or password");
        $userService->login($email, $password);
    }
}

In this example, the test class extends the PHPUnit\Framework\TestCase class, which provides a testing framework for writing unit tests in PHP. The testLoginSuccess method creates a mock object for the UserRepository using the createMock method, and configures it to return a specific user when the getByEmailAndPassword method is called. The UserService is instantiated with the mock repository, and the login method is called with the email and password. The result is then compared to the expected user to ensure that the method is working as expected.

The testLoginFail method is similar, but it configures the mock repository to return null, which represents an invalid email and password. The test then expects an exception to be thrown with a specific message, which is checked to ensure that the exception is thrown correctly.

These tests ensure that the UserService class is working correctly, and that it will behave correctly in the event of an invalid login attempt. The tests are also isolated from the actual data access layer, which makes them more reliable and easier to maintain over time.

Setup Docker on your PHP, MySql and Ngnix web application

Docker is a powerful tool that allows developers to easily create and manage isolated environments for their applications. In this guide, we will walk through the process of setting up a Docker environment for PHP development that includes MySQL, Composer, and Nginx.

Step 1: Install Docker and Docker Compose

The first step is to install Docker and Docker Compose on your machine. You can download the Docker Desktop for Mac or Windows, or for Linux you can follow the instructions for your specific distribution. Here are the instruction for install it on linux ubuntu

To install Docker:

  1. Update the system: sudo apt update
  2. Install dependencies: sudo apt install apt-transport-https ca-certificates curl software-properties-common
  3. Add Docker GPG key: curl -fsSL https://download.docker.com/linux/ubuntu/gpg | sudo apt-key add -
  4. Add Docker repository: sudo add-apt-repository "deb [arch=amd64] https://download.docker.com/linux/ubuntu $(lsb_release -cs) stable"
  5. Update package index: sudo apt update
  6. Install Docker: sudo apt install docker-ce

To install Docker Compose:

  1. Download the binary: sudo curl -L "https://github.com/docker/compose/releases/download/1.27.4/docker-compose-$(uname -s)-$(uname -m)" -o /usr/local/bin/docker-compose
  2. Apply executable permissions: sudo chmod +x /usr/local/bin/docker-compose
  3. Verify the installation: docker-compose --version

Step 2: Create a new directory for your project

Create a new directory for your project and navigate into it. This will be the root of your project and where all of your code and configuration files will be stored.

Step 3: Create a Dockerfile

Create a new file called “Dockerfile” in your project’s root directory. This file will contain the instructions for building your Docker image.

Here is an example of a basic Dockerfile for PHP development:

FROM php:7.4-fpm

RUN apt-get update && apt-get install -y \
    libpq-dev \
    libzip-dev \
    zip \
    unzip

RUN docker-php-ext-install pdo_mysql \
    && docker-php-ext-configure zip --with-libzip \
    && docker-php-ext-install zip

COPY . /var/www/html

WORKDIR /var/www/html

CMD ["php-fpm"]

This Dockerfile starts from the official PHP 7.4 FPM image, installs the necessary dependencies for using PDO with MySQL and the Zip extension, copies the contents of the current directory to the webroot, and sets the working directory to the webroot.

  1. FROM php:7.4-fpm specifies the base image to be used for building the Docker image. In this case, it’s using the PHP 7.4 FPM (FastCGI Process Manager) image from the official PHP Docker repository.
  2. RUN apt-get update && apt-get install -y updates the package list and installs the dependencies listed after it:
    • libpq-dev
    • libzip-dev
    • zip
    • unzip
  3. RUN docker-php-ext-install pdo_mysql installs the PDO (PHP Data Objects) extension for MySQL.
    • docker-php-ext-configure zip --with-libzip configures the zip extension to use libzip.
    • docker-php-ext-install zip installs the zip extension.
  4. COPY . /var/www/html copies all the files in the current directory to the /var/www/html directory in the Docker image.
  5. WORKDIR /var/www/html sets the working directory to /var/www/html, where the application files will be located.
  6. CMD ["php-fpm"] specifies the command to run when the Docker image is started. In this case, it’s running the php-fpm service.

Step 4: Create a docker-compose.yml file

Create a new file called “docker-compose.yml” in your project’s root directory. This file will define the services that make up your application and how they are connected.

Here is an example of a basic docker-compose.yml file for PHP development:

version: '3'
services:
  web:
    build: .
    ports:
      - "9000:9000"
    volumes:
      - .:/var/www/html
  db:
    image: mysql:5.7
    ports:
      - "3306:3306"
    environment:
      MYSQL_ROOT_PASSWORD: root
      MYSQL_DATABASE: mydb
      MYSQL_USER: myuser
      MYSQL_PASSWORD: mypassword
  nginx:
    image: nginx:latest
    ports:
      - "80:80"
    volumes:
      - .:/var/www/html
      - ./nginx/default.conf:/etc/nginx/conf.d/default.conf

The file docker-compose.yml is used to define and run multi-container Docker applications with Docker Compose. The content in the file describes the services needed to run the application and how they should be configured.

  1. version: '3' specifies the version of the Docker Compose file format used. In this case, it’s using version 3.
  2. services: section defines the services needed for the application:
    • web: section describes the service that runs the web application.
      • build: . specifies that the Docker image should be built using the Dockerfile in the current directory.
      • ports: maps the host’s port 9000 to the container’s port 9000, allowing external access to the web service.
      • volumes: mounts the current directory to the /var/www/html directory in the container, allowing changes to the code to take effect immediately.
    • db: section describes the service that runs the database.
      • image: mysql:5.7 specifies the MySQL 5.7 image to be used for the database service.
      • ports: maps the host’s port 3306 to the container’s port 3306, allowing external access to the database.
      • environment: sets the environment variables for the database service, including the root password, database name, user, and user password.
    • nginx: section describes the service that runs the web server.
      • image: nginx:latest specifies the latest version of the Nginx image to be used for the web server service.
      • ports: maps the host’s port 80 to the container’s port 80, allowing external access to the web server.
      • volumes: mounts the current directory to the /var/www/html directory in the container and the nginx/default.conf file to the /etc/nginx/conf.d/default.conf file in the container, allowing changes to the configuration to take effect immediately.

This file defines three services: web, db, and nginx. The web service uses the Dockerfile in the current directory, maps port 9000 to the host, and mounts the current directory as a volume. The db service uses the official MySQL 5.7 image, maps port 3306 to the host, and sets the necessary environment variables for the root password, database name, user, and password. The nginx service uses the official Nginx image, maps port 80 to the host, and mounts the current

Building Web Applications with PHP Frameworks and Libraries

PHP is one of the most widely-used programming languages for building web applications. It’s open-source, easy to learn, and has a wide range of libraries and frameworks that can help developers to build high-performance, reliable, and scalable applications quickly. In this blog post, we will take a look at some of the most popular PHP frameworks and libraries that are widely used by developers to build web applications.

Laravel: Laravel is a free, open-source PHP web framework, created by Taylor Otwell. It is designed for the development of web applications following the model–view–controller (MVC) architectural pattern. Laravel is built on top of PHP’s core features and adds many additional features such as routing, controllers, middleware, and an ORM. Laravel’s syntax is elegant and easy to read, making it a great choice for developers who are new to PHP.

Symfony: Symfony is a set of reusable PHP components and a web application framework. Symfony is a stable, scalable, and maintainable framework that is well-suited for large-scale enterprise projects. Symfony is built on top of a set of reusable components, which can be used to build any kind of web application. Symfony’s components can be used separately, or together as a full-featured framework.

CodeIgniter: CodeIgniter is a lightweight PHP framework that is designed for developers who need a simple and elegant toolkit to create full-featured web applications. CodeIgniter is easy to learn and is based on the Model-View-Controller (MVC) development pattern. CodeIgniter provides a simple interface and logical structure to access a database, and it’s easy to use libraries and helpers.

In conclusion, choosing the right framework or library for your project can have a significant impact on the development process. Laravel, Symfony, and CodeIgniter are all great options for building web applications with PHP. They all have their own strengths and weaknesses, so it is important to choose the one that best fits your project’s needs.

These frameworks and libraries are not only easy to use, but also provide a lot of features that help developers to quickly and easily build web applications. By using these frameworks and libraries, developers can focus on the logic of their application rather than worrying about the underlying infrastructure.

It’s worth noting that there are many other popular PHP frameworks and libraries, such as Zend Framework, Yii, and CakePHP. It’s worth researching and trying out different options to find the one that best fits your needs.

Exploring Advanced Concepts in PHP: Multithreading, Event-Driven Programming, and Functional Programming | PHP Beginner to Advance

PHP, the popular server-side scripting language, is widely used for web development and has evolved significantly over the years. As PHP developers, it’s important to stay up-to-date with the latest features and best practices to build efficient and scalable applications.

In this blog post, we will explore three advanced concepts in PHP: multithreading, event-driven programming, and functional programming. These concepts are not commonly used in everyday PHP development, but they can provide powerful solutions for specific use cases.

Multithreading is a technique that allows a program to run multiple threads simultaneously. This can improve the performance of your application by allowing different tasks to run in parallel. In PHP, multithreading can be achieved using the pthreads extension, which provides an object-oriented interface for working with threads.

Event-driven programming is a programming paradigm in which the flow of the program is determined by events, rather than a sequential flow of instructions. In PHP, event-driven programming can be achieved using the ReactPHP library, which provides an event loop, non-blocking I/O, and timers.

Functional programming is a programming paradigm that emphasizes immutability and the use of pure functions. In PHP, functional programming can be achieved using the functional programming features introduced in PHP 7.x such as anonymous functions, closures, and the array_map() function.

It’s important to note that these advanced concepts are not always the best choice for every situation, but it’s good to know about them and when to use them.

In conclusion, multithreading, event-driven programming, and functional programming are powerful concepts that can help you build more efficient and scalable applications. However, they are not always the best choice for every situation, so it’s important to understand when to use them. With the knowledge of these concepts, you can take your PHP development skills to the next level and tackle more complex projects with confidence.

Here are the parts of the series